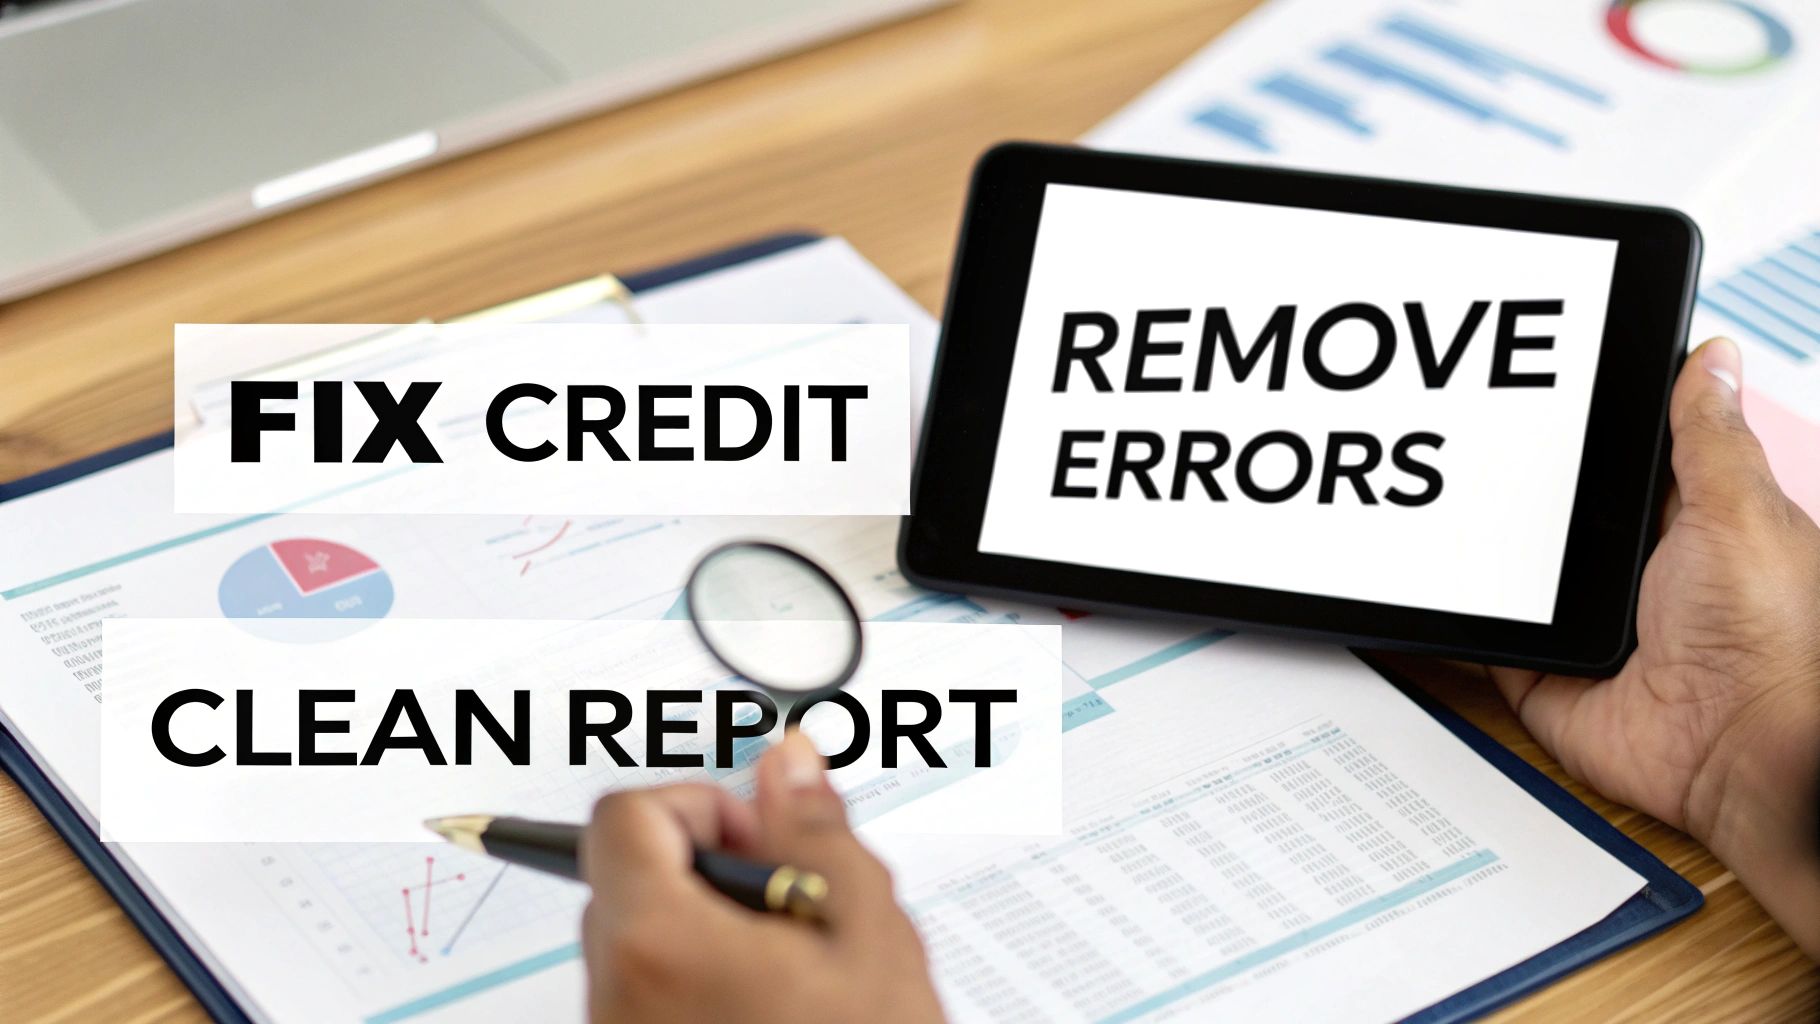
How to Remove Derogatory Items from Your Credit Report Easily
Your first move in cleaning up your credit report is to find the things that don't belong there. You're looking for any negative marks that are inaccurate, out-of-date, or simply can't be proven. Your best weapon in this fight is the Fair Credit Reporting Act (FCRA). This federal law gives you the power to challenge those errors, and it legally requires the credit bureaus to investigate your claims. If they can't verify the item, they have to delete it.
What Derogatory Items Mean for Your Credit

Before you can fix the problem, you need to know exactly what you’re up against. Derogatory items are basically red flags on your credit report that scream "risky borrower" to lenders. These marks can drag your credit score down, making it much harder to get a loan, a new credit card, or even rent an apartment.
Think of your credit report as your financial resume. Just like a typo on a CV can get you tossed from the "yes" pile, a derogatory mark can stop you from hitting your financial goals. But not all negative items are created equal—they come in different flavors, each with its own level of severity and a set timeline for how long it can legally haunt your report.
The Most Common Negative Marks
When you pull your credit history, you'll likely run into a few common types of derogatory items. Each one paints a different picture of your financial past.
Getting familiar with these is the first real step in figuring out a game plan.
To help you see the bigger picture, here’s a quick breakdown of the usual suspects, how long they stick around, and the kind of trouble they can cause.
Table: Common Derogatory Items and How They Affect You
Seeing it all laid out like this really drives home how long a single mistake can follow you. But the key thing to remember is that these timelines aren't a life sentence—they're just the maximum allowed by law.
How Long Negative Information Stays on Your Report
A lot of people think that once a negative mark hits your report, it's there forever. Thankfully, that's not true. The FCRA puts strict limits on how long most of these derogatory items can stay on your credit file.
Here's the fundamental rule: only inaccurate, outdated, or unverifiable information can be legally removed ahead of schedule. Legitimate negative marks like late payments, collections, and charge-offs will generally stay on your reports for up to seven years from the date you first fell behind. Bankruptcies are the big one—they can stick around for up to ten years.
This time limit is your friend. As negative items get older, their sting lessens, and their impact on your credit score starts to fade even before they fall off your report completely.
This is the entire foundation of credit repair. Your power isn't in wishing away valid mistakes from your past; it's in holding the credit bureaus and your creditors to a standard of 100% accuracy. Once you understand your rights under the FCRA, you stop being a victim of your credit history and start taking control of your financial future.
How to Find and Document Credit Report Errors

Alright, this is where the real work begins. Think of yourself as a financial detective, because cleaning up your credit report is all about spotting verifiable errors. It’s less about arguing with a creditor and much more about finding mistakes in how they've reported your information. To do this right, you need to be methodical.
First things first: you absolutely must get copies of your credit reports from all three major bureaus—Equifax, Experian, and TransUnion. Lenders don’t always report to all three, so a negative item might haunt you on one report but be completely absent on another. Checking all of them is non-negotiable.
The only place you should go for this is AnnualCreditReport.com. It's the official, government-authorized source, and it lets you pull your reports for free every single week. This is a game-changer when you're in the middle of the dispute process.
Your Initial Review Strategy
Once you have all three reports in hand, don't just glance over them. I always recommend printing them out, grabbing a highlighter, and sitting down to review each one, line by line. Your mission is to cross-reference every single detail across the three reports and compare them with your own records.
You’re not just looking for huge, obvious blunders. The smallest inconsistency can be enough to file a valid dispute. Here’s the key takeaway:
Don't assume your reports are correct. It’s far more common to find mistakes than you might think. In fact, a study from the Consumer Financial Protection Bureau found that about 20% of consumers have a "potentially material error" in their credit file. Digging deeper, incorrect data makes up a staggering 74% of all consumer complaints about credit reporting. You can learn more about this from Brookings' research on the prevalence of credit report errors.
Common But Costly Mistakes to Spot
As you comb through each report, start a running list of anything that looks even slightly off. Many people zero in on big problems like charge-offs and completely miss the smaller, easier-to-win disputes.
Here's what you should be hunting for:
A perfect real-world example is a single medical bill that goes to collections. The original hospital might report it, and then the collection agency reports the exact same debt as a new item. Suddenly, your credit report makes it look like you have two separate negative accounts, which gives you a powerful angle for a dispute.
Building Your Evidence File
Every error you identify is a piece of evidence. For each questionable item, you need to start building a clear, organized case file. Don't just rely on your memory—document everything.
For each potential dispute, your notes should include:
This "case file" isn't just for your own reference; it's the raw material for your dispute letters. The more organized you are now, the more effective your disputes will be later. This approach turns you from someone simply complaining into a person presenting a factual, evidence-based challenge that the bureaus are legally required to investigate.
Writing a Dispute Letter That Gets Results
Once you've gathered all your evidence, it's time to draft your dispute letter. This is your formal request, and how you write it matters. Think of it less as a letter and more as a legal document. This isn't the place to share a long, emotional story about financial hardship; it's a direct, fact-based communication designed to achieve one specific outcome: getting an inaccurate item removed from your report.
You'll see a lot of generic templates online, but I'd advise against a simple copy-and-paste job. A truly effective letter is clear, firm, and tailored specifically to your situation. The goal is to make it incredibly easy for the investigator at the credit bureau to understand your claim, look at your evidence, and agree with you.
The Anatomy of an Effective Dispute Letter
Every letter you send needs to have a few core components. If you miss any of these, you're just asking for delays or an outright rejection of your dispute.
Make sure your letter clearly includes:
That last point is where most people go wrong. Just writing "this isn't my account" is weak. A much stronger approach is something like, "This collection account, number 12345, is inaccurate. I have no record of a contractual relationship with XYZ Company, and I am requesting full verification of this alleged debt as required under the FCRA." See the difference? It’s professional and puts the burden of proof on them.
What to Include and What to Leave Out
The body of your letter is your chance to make a compelling case without oversharing. You want to give them just enough information to prove your point, and nothing more.
For instance, let’s say you're fighting a late payment that was reported by mistake. Don't write a paragraph about your paycheck being late. Instead, be direct: "The 30-day late payment reported for my ABC Bank credit card for May 2023 is inaccurate. As you can see from the enclosed bank statement, my payment was made on time on May 15th." It's factual, direct, and immediately points to the evidence.
The Power of Supporting Documentation
Your letter makes the claim, but your evidence proves it. The documents you collected earlier are your best ammunition.
Always, always include copies—never the originals!—of any proof you have. This could be anything from:
Here’s a tip I always give people: take a highlighter and circle the key information on your documents. It guides the investigator's eyes right to the proof, making their job easier and strengthening your argument.
Since a dispute letter is really a type of formal complaint, learning how to effectively write a complaint letter can give you a real edge. The core principles of being clear, concise, and evidence-based are exactly what you need here.
Sending Your Dispute the Right Way
Don’t just drop your letter in a mailbox and hope for the best. While the bureaus push you toward their online dispute forms, for a serious dispute, there's a better way: send a physical letter via certified mail with a return receipt requested.
Why is this so important? It creates an undeniable paper trail. That little green return receipt card you get back in the mail is your legal proof that the credit bureau received your letter and the exact date they signed for it. This is huge because it officially starts the clock on their legally required 30-day investigation window under the FCRA.
This small extra cost is an investment in your protection. If a bureau drags its feet or claims they never got your letter, your certified mail receipt is the hard evidence you need to hold them accountable. If you want a more detailed breakdown of the process, you can get more specifics on how to dispute credit report errors to make sure you've got all your bases covered. This old-school method shows them you’re serious.
Managing the 30-Day Investigation Period
So, you’ve sent your dispute letter via certified mail. Now what? The ball is officially in the credit bureau's court, and the clock starts ticking. This isn't just a waiting game, though; it’s a crucial window where you need to stay prepared.
Under the Fair Credit Reporting Act (FCRA), the credit bureaus generally have 30 days from the moment they receive your dispute to investigate your claim. Their first move is to contact the company that reported the information in the first place—what the industry calls the "furnisher." They'll pass along all the documentation you sent.
What to Expect While You Wait
The furnisher is then legally required to conduct its own internal investigation to see if the information they reported is accurate. They might confirm it's correct, admit it was an error, or simply not respond at all.
This is where your certified mail receipt really pays off. It creates an undeniable start date for that 30-day investigation deadline. If the furnisher can't verify the information or just ignores the request, the credit bureau must delete the item. It’s that simple. Don't panic if you don't hear anything for a few weeks; they often use every last day of that 30-day period.
This infographic breaks down the key elements that force the bureaus to take your claim seriously and launch a proper investigation.
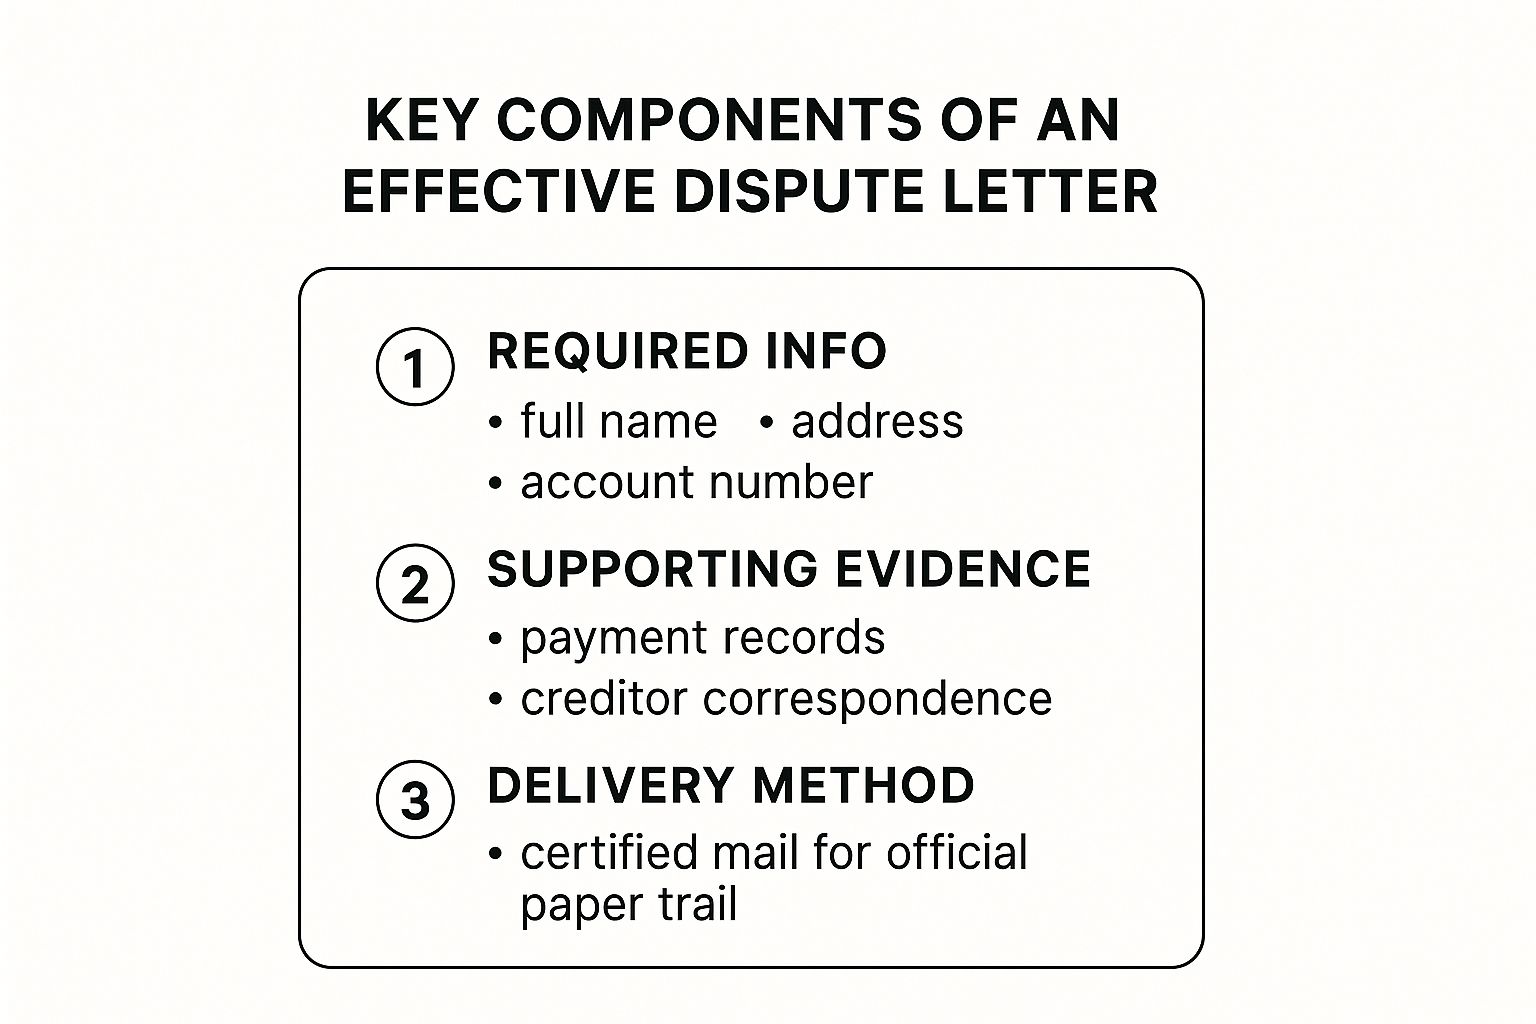
As you can see, clear proof, proper identification, and a verifiable delivery method are the cornerstones of a dispute they can't ignore.
While you're waiting, it’s a good idea to keep a close eye on your credit files. This is a great time to learn about what is credit monitoring and how it can give you a heads-up the moment a change appears on your report.
Preparing for Every Possible Outcome
Once the investigation wraps up, you’ll get a letter in the mail detailing the results. The outcome will usually fall into one of three buckets, and having a game plan for each is essential. Knowing what to do next is the key to successfully removing derogatory items from your credit report.
Let's walk through the potential outcomes and how you should respond.
Dispute Outcomes and Your Next Steps
The results of your dispute will dictate your next move. This table breaks down what each outcome means and the best course of action to take.
Remember, even if an item is "verified," you have more moves to make. If you’re certain the information is wrong, your next step is to file a complaint with the Consumer Financial Protection Bureau (CFPB). The CFPB has real teeth, and companies are required to respond to their inquiries, giving you another powerful ally in getting the error fixed.
Building a Stronger Credit Profile for the Future

Getting an inaccurate derogatory mark removed is a huge win. Seriously, pop the champagne. But once the dust settles, the real work begins. Cleaning up your report is like clearing a path through a dense forest; now you actually have to walk down it. This next phase is all about playing the long game—actively rebuilding and protecting your credit score from here on out.
This isn't just about fixing old mistakes. It's about building new, powerful habits that will serve you for life. The strategies themselves are pretty straightforward, but consistency is where the magic happens. By focusing on the right behaviors, you can make sure your credit report truly reflects the responsible borrower you are today.